Saturday, June 20, 2026

The Ultimate Gravestone Doji Trading Guide: Master Market Tops and Bearish Reversals Like an Expert

A comprehensive, advanced human-written blueprint to recognizing institutional distribution, timing short entries, and protecting capital during volatile market peaks.

It is one of the oldest clichés in financial market history, yet retail traders fall victim to it every single day: buying the absolute top of a structural bull run. We have all experienced that specific, intoxicating feeling. You open your favorite crypto app, trading platform, or financial news site, and everything is bright green. Prices have been climbing relentlessly for weeks. The mainstream media is running celebratory headlines, online forums are filled with retail investors calculating their paper wealth, and a powerful wave of FOMO (Fear of Missing Out) overwhelms your rational judgment.

You finally give in and press the "Buy" button. Almost instantly, the market stalls. The upward momentum vanishes, and the asset drops into a devastating, cascading sell-off. You are left holding an overvalued asset at the worst possible entry price, watching your hard-earned capital evaporate.

Finding the exact pivot point where an aggressive bull market runs out of steam has long been considered one of the most challenging tasks in technical analysis. But the market isn't entirely unpredictable. It leaves structural footprints behind. It drops warning signs directly onto your price charts to signal that the dominant buyers are losing control and an aggressive wave of selling pressure is waiting to take over.

That is exactly what this comprehensive gravestone doji trading guide is designed to teach you. Named for its ominous, stone-like visual appearance and its historical reputation for putting overextended bull runs to rest, the gravestone doji is an exceptionally reliable single-candle bearish reversal pattern. When interpreted correctly within the proper market context, it acts like a clear warning signal, alerting smart money to take profit and giving short-sellers a precise window to strike.

Gravestone doji candlestick anatomy showing a long upper wick and a flat bottom line on a professional dark mode trading chart

Figure 1: The textbook structural profile of a Gravestone Doji, showcasing an exceptionally tall upper shadow with the open, close, and low sitting flush at the very bottom.

In this ultimate deep-dive guide, we will unpack everything you need to become an expert on this pattern. We will explore its micro-structural anatomy, analyze the psychological battle of greed and fear that creates it, map out five high-probability trading strategies, establish strict risk management parameters, and examine how to spot and filter out treacherous fakeouts. Pull up a chair, open your live charting software, and let's master the art of trading market tops.


1. A Deep Primer on Japanese Candlestick Dynamics

To successfully integrate the gravestone doji trading guide into your daily routine, you must first possess a rock-solid understanding of how Japanese candlesticks record price action. Looking at a price chart shouldn't feel like staring at random lines; it should feel like reading a live map of market supply and demand.

Every single candlestick represents a localized window of time—whether it is a 5-minute chart for day trading or a daily chart for swing trading. During that specific window, four critical data points are tracked and permanently recorded:

  • The Open: The initial price level where buyers and sellers established equilibrium when the time session started.
  • The Close: The final price level agreed upon by the market when the session concluded.
  • The High: The absolute maximum boundary that aggressive buyers managed to achieve during the session.
  • The Low: The absolute minimum boundary that aggressive sellers managed to touch during the session.

The thick, colored center of a standard candlestick is called the real body. It visually fills the space between the opening price and the closing price. When an asset finishes a session at a higher price than where it started, the real body is colored green or white, signaling a bullish outcome. Conversely, when the asset closes lower than its open, the body turns red or black, indicating a bearish session.

The thin vertical lines protruding from the top and bottom of the real body are known as the wicks, shadows, or tails. These lines are critical for price action traders because they highlight areas of price rejection. A long wick proves that the market actively traveled to an extreme price point but lacked the structural conviction to stay there before the session ended. As we will see shortly, understanding this rejection is the secret to mastering the gravestone doji.

2. The Structural Anatomy of a True Gravestone Doji

The gravestone doji is a single-candle pattern that serves as an explicit visual warning of a potential bearish reversal. It looks like an upside-down capital letter 'T' or a stone monument planted firmly in the ground. Because financial charts are filled with random, choppy price movements, you must follow strict structural rules to identify a true gravestone doji and avoid costly false signals.

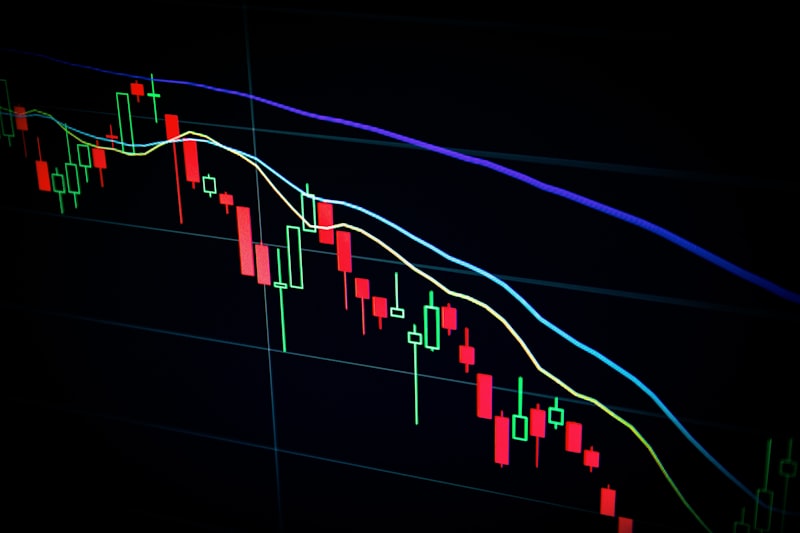
Technical analysis charting screen with candlestick data bars

A clean visual layout makes it easy to isolate real doji formations from surrounding market noise.

To qualify as a genuine, tradable gravestone doji, a candlestick must perfectly satisfy these three physical criteria:

  1. The Open, Close, and Low Alignment: The absolute bottom of the candle must look like a flat, horizontal line. This means that the asset opened for trading, spent the session fluctuating wildly, and ultimately closed at or near the exact same level as its opening price. Crucially, the lowest point touched during the session must also match this open/close zone.
  2. The Exceptionally Tall Upper Wick: The upper shadow must be long and prominent. As a professional rule of thumb, this wick should be at least three times the height of any minor real body that might exist. The longer this upper tail is, the more violent the price rejection was, and the more powerful the bearish signal becomes.
  3. Virtually No Real Body: Unlike a standard bearish candle, a textbook doji features zero body thickness. The closing price should match the opening price precisely. If there is a tiny, paper-thin sliver of a red or green body, it can still be traded as a gravestone variant, but a completely flat line represents the highest level of trend exhaustion.

Why Chart Location Overrides Everything

This is the most critical rule of our gravestone doji trading guide: A true gravestone doji can only exist at the peak of a clear, extended uptrend. If you spot this exact shape forming inside a choppy, sideways consolidation channel, or right after a prolonged market crash, it is completely invalid. Without a strong prior uptrend to reverse, the shape is just random noise. Context always dictates the meaning of price action.

3. The Hidden Market Psychology Behind the Pattern

To trade price action like an institutional professional, you must stop looking at charts as simple geometric patterns and start reading them as a psychological battleground between human buyers and sellers. The gravestone doji represents an unexpected shift in market control. It tells a vivid story of overconfidence, institutional distribution, and a total shift in supply and demand.

Let’s step into a time machine and examine the internal psychological progression of a gravestone doji session as it forms:

Phase 1: Euphoria and Overconfidence
The asset has been climbing steadily for a long period. The general market sentiment is incredibly bullish, and retail traders are aggressively buying every minor dip. When the new candle opens, the bulls immediately take control, flooding the order book with buy orders and driving the price to fresh local highs. At this moment, the candle looks like a long, solid green bullish bar. The buyers feel invincible.

Phase 2: The Institutional Ambush
As the price reaches its absolute peak, it enters an area that institutional players, hedge funds, and large commercial banks consider overvalued. These large participants choose to take profit on their long positions and simultaneously open massive short positions. This sudden influx of institutional supply completely swallows all retail buying power.

Phase 3: The Panic Retreat
With no buyers left to sustain the high prices, the massive wave of institutional sell orders drives the price back down. The late-buying retail traders realize they are caught at the top and begin liquidating their positions in a panic, accelerating the decline. By the time the session closes, the price has collapsed back to the opening print.

The Takeaway: The resulting long upper wick is a clear record of an absolute failure. It proves that the buyers tried to push the market higher but were completely overwhelmed by sellers. The balance of power has officially shifted from demand to supply.

4. Pattern Differentiation: Clearing the Beginner Confusion

A major pitfall for newer traders is confusing the gravestone doji with other single-candle formations that look visually similar but carry completely different market meanings. Let's clear up any confusion so you can identify charts with absolute clarity.

Gravestone Doji vs. Shooting Star

Both of these patterns occur at the peak of an uptrend and signal a bearish drop. However, their structural definitions differ slightly:

  • A Gravestone Doji has no real body. The open, close, and low are virtually identical, forming a flat horizontal line at the very bottom of the candle.
  • A Shooting Star features a small but distinct real body at the bottom of the long upper wick. The close is slightly separated from the open, meaning the bears didn't completely push the price all the way back to the starting point. Both are bearish, but the doji represents a cleaner state of equilibrium and exhaustion.

Gravestone Doji vs. Dragonfly Doji

These two patterns are exact mirror images of each other and carry completely opposite meanings:

  • The Gravestone Doji has its long wick pointing upward, forms at the top of an uptrend, and signals a bearish market top.
  • The Dragonfly Doji has its long wick pointing downward, forms at the bottom of a severe downtrend, and signals a bullish market bottom.
Candlestick Pattern Visual Structure Required Trend Context Resulting Market Outlook
Gravestone Doji Long upper wick, flat bottom line Peak of an Uptrend Bearish Reversal (Short)
Shooting Star Long upper wick, small lower body Peak of an Uptrend Bearish Reversal (Short)
Dragonfly Doji Long lower wick, flat top line Bottom of a Downtrend Bullish Reversal (Long)

5. Five High-Probability Gravestone Doji Trading Blueprints

Professional traders never risk capital based solely on a single candlestick shape. To achieve long-term profitability, you must use a rule-based setup that combines the candle with other technical tools. Here are five powerful trading blueprints that utilize the gravestone doji.

Blueprint #1: The Macro Resistance Confluence Strategy

This strategy relies on historical price ceilings where significant selling pressure has previously emerged. It is one of the most reliable ways to short a market top.

  • Step 1: Identify a clear horizontal resistance line on your daily chart where the price has stalled and reversed lower at least twice in the past.
  • Step 2: Watch the asset execute a fresh rally back up toward this established resistance zone.
  • Step 3: Wait for a gravestone doji to form, with its long upper wick piercing through the resistance line before closing back below it. This confirms that institutional sellers are defending the level.
  • Step 4: Place a sell-stop order just below the low of the doji candle to trigger your short entry.

Blueprint #2: The Next-Candle Confirmation Rule

This setup prioritizes capital safety over catching the absolute highest entry price. It is highly recommended for beginners who want to avoid sudden false breakouts.

  • Step 1: Locate a clean gravestone doji at the peak of an extended upward move.
  • Step 2: Do not enter a trade immediately on the close of the doji. Wait for the next candle to print.
  • Step 3: Verify that the next candle opens and closes as a solid red, bearish candle that breaks below the lowest point of the gravestone doji. This confirmation candle proves that sellers have maintained control into the next session.
  • Step 4: Open your short position immediately upon the close of this confirmation candle.

Blueprint #3: The Overbought RSI Divergence Setup

This strategy combines price action with momentum indicators to find turning points where a trend is running on fumes.

  • Step 1: Add the Relative Strength Index (RSI) indicator to your chart. Look for a market where the price is hitting fresh higher highs, but the RSI line is making lower highs. This is called bearish divergence.
  • Step 2: Check if the RSI indicator is well above the 70 line, indicating deeply overbought market conditions.
  • Step 3: If a gravestone doji forms at the exact moment the bearish divergence appears, enter a short trade, anticipating a significant momentum shift.
Financial charts displaying advanced oscillators and candlestick analysis

Using indicators alongside candlestick patterns creates a powerful combination for filtering entries.

Blueprint #4: The Institutional Distribution Volume Filter

Volume represents the fuel of financial markets. This filter separates minor retail pullbacks from major institutional reversals.

  • Step 1: Monitor the volume bars at the bottom of your chart when a gravestone doji prints.
  • Step 2: Look for a volume bar that is significantly taller than the 20-period average volume line.
  • Step 3: This high volume indicates that institutional players are unloading large positions into retail buyers. Enter the short trade on the next candle's open.

Blueprint #5: The Fib Retracement Golden Pocket Confluence

Fibonacci retracement tools help locate hidden areas of support and resistance during a macro downward trend.

  • Step 1: Draw a Fibonacci retracement tool from a major macro swing high down to a major swing low.
  • Step 2: Wait for a temporary counter-trend rally to lift the price back up into the "Golden Pocket" region (the 61.8% or 78.6% retracement levels).
  • Step 3: If a gravestone doji forms precisely within this golden pocket zone, enter a short position, anticipating that the broader downward trend is ready to resume.

6. Risk Management Math: Protecting Your Capital

An effective trading strategy is only as good as its risk management. Without logical rules for managing risk, a string of wins can easily be wiped out by a single unmanaged loss. When shorting market tops, risk management is particularly critical because upward breakouts can be fast and explosive.

Determining Your Stop-Loss Placement

A stop-loss order should be placed at the exact price point where your trading thesis is proven wrong. For a gravestone doji setup, that point is clear:

The Absolute Stop-Loss Rule: Place your protective stop-loss order a few pips or cents just above the highest point of the gravestone doji’s upper wick.

If the market rallies past that wick, it means buyers have completely invalidated the rejection signal. The pattern has failed, and you should exit the trade immediately to protect your capital. Never widen a stop-loss on an open short position.

Setting Logical Take-Profit Levels

To establish profitable exit targets, look to the left of your chart to identify key horizontal support lines, old swing lows, or major psychological round numbers. These are areas where buyers are likely to re-emerge.

Always structure your setups to achieve a minimum 1:2 risk-to-reward ratio. If your stop-loss requires risking $100 from your entry point, your take-profit target must be placed at a level that secures at least $200 in profit. This mathematical edge ensures that even if you win only half of your trades, your account can remain profitable over time.

7. Weighing the Pros and Cons of This Strategy

Every trading setup has its advantages and limitations. To build a balanced approach, you must understand both sides of the coin.

The Structural Advantages (Pros)

  • Provides a precise entry point at the early stages of a market top reversal.
  • Features a clear, well-defined price level for stop-loss placement.
  • Highly effective on higher timeframes like the 4-hour and daily charts.
  • Helps long-term investors identify optimal times to take profit on open positions.

The Market Limitations (Cons)

  • Can result in false signals during strong bull markets driven by high fundamental momentum.
  • Can occasionally require wide stop-losses if the candle's upper wick is exceptionally long.
  • Requires patience, as validation can take several candles to unfold.

8. Critical Pitfalls Beginners Must Actively Avoid

To avoid unnecessary losses, ensure you steer clear of these two common mistakes:

Mistake #1: Shorting into Strong Fundamental Momentum
If a stock or cryptocurrency is rallying because of strong, transformative fundamental news (such as an earnings beat or major regulatory approval), a single gravestone doji will rarely halt the trend. In a high-momentum environment, do not step directly in front of a moving train. Always wait for the broader market momentum to cool down before executing your short thesis.

Mistake #2: Trading Low-Volume Assets
On illiquid assets or thinly traded penny stocks, candlestick shapes can easily be distorted by a small number of orders. This diminishes their predictive accuracy. Only trade the gravestone doji on highly liquid, large-cap assets where price movements reflect true institutional supply and demand.

9. Advanced Professional Filters to Maximize Accuracy

If you want to take your chart reading to a professional level, apply these advanced filters to your watchlists:

  • Identify Multi-Month Tops: A gravestone doji that forms at an all-time high or a multi-month peak carries significantly more weight than one that appears on a minor daily bounce. Focus on setups with significant historical context.
  • Utilize Free Automated Screener Tools: Instead of manually searching through hundreds of charts, use screeners like TradingView to filter for doji patterns across your preferred watchlists automatically.
  • Track Your Results via a Performance Journal: Maintain a detailed log of every short setup you execute. Document the asset, timeframe, volume, and risk-to-reward ratio. Over a sample size of 30 to 50 trades, this data will show you exactly which market conditions produce your highest win rates.

10. Comprehensive Frequently Asked Questions (FAQ)

What happens if the gravestone doji has a tiny lower wick?

A tiny lower shadow does not invalidate the pattern. As long as the upper wick is exceptionally long and the real body is virtually flat at the bottom of the candle's range, it can still be effectively traded as a valid gravestone variant.

Which timeframe is most accurate for trading this pattern?

The daily (1D) and 4-hour (4H) timeframes offer the highest reliability. While the pattern forms on 1-minute and 5-minute charts, shorter timeframes contain a high degree of market noise and false signals, making them much less reliable over time.

Can I use this pattern to exit long positions rather than shorting?

Yes! The gravestone doji is an excellent trade management tool. If you are holding a long position and spot a gravestone doji forming at a major resistance level, it serves as a logical signal to take profit or lock in gains before a potential reversal begins.

Why is it called a "gravestone" doji?

The pattern is named after its physical resemblance to a traditional gravestone. In Japanese charting history, it also carries a symbolic meaning, suggesting that the bulls have died defending higher prices at that specific level.

The Bottom Line Summary

The gravestone doji is a highly effective technical pattern for identifying market tops and trend exhaustion. By training your eyes to look for the long upper wick at key resistance zones and waiting for next-candle confirmation, you can navigate volatile market peaks with precision. Practice identifying this setup on a risk-free demo account first, apply disciplined risk management rules, and let technical price action help clear up your trading decisions!

The Ultimate Guide to the Inverted Hammer Candle Strategy: Master Trend Reversals Like a Pro

Written by an experienced market technician to help you spot market bottoms, avoid fakeouts, and protect your capital with precision rules.

Have you ever stared at a price chart, watching a favorite stock, cryptocurrency, or forex pair slide lower day after day? It feels like catching a falling knife. You want to buy the dip, but every time you do, the price drops even further. This is the ultimate frustration for retail traders. Finding the exact moment a brutal downtrend turns into a massive explosive rally is often considered the holy grail of trading.

What if the market dropped a clear, physical breadcrumb on your chart to tell you that the balance of power has shifted? What if a single candlestick could signal that the aggressive sellers are completely exhausted, and an army of buyers is ready to launch the price upward?

Master the inverted hammer candle strategy. Learn how to spot this powerful candlestick pattern, set smart stop-losses, and find winning trend reversal setups today.

Welcome to the world of price action trading. Today, we are going to dive incredibly deep into one of the most reliable and beginner-friendly reversal patterns in existence: the inverted hammer candle strategy. This single-candle formation serves as a bright warning flare across financial markets, warning short-sellers to cover their positions and welcoming long-term buyers to step up to the plate.

In this comprehensive, step-by-step guide, we will unpack everything you need to know about the inverted hammer pattern. We will explore its internal mechanics, analyze the human emotions that create it, build five high-probability trading blueprints around it, and review the golden risk management rules required to keep your money safe. Grab a coffee, open up your favorite charting platform, and let’s master this strategy together.


1. A Quick Primer on Candlestick Charts

Before we dissect the inverted hammer specifically, we must ensure we understand how to read a standard Japanese candlestick chart. If you are already familiar with standard candlesticks, feel free to skip ahead to the next section! However, for absolute beginners, a quick review is vital.

A candlestick is a visual representation of price action over a specific timeframe (such as 5 minutes, 1 hour, or 1 day). Every single candle tells a unique story based on four critical data points:

  • Open: The price of the asset when the time period started.
  • Close: The price of the asset when the time period ended.
  • High: The absolute highest price reached during that time period.
  • Low: The absolute lowest price reached during that time period.

The thick middle section of the candle is called the real body. It displays the distance between the opening price and the closing price. If the asset closed higher than it opened, the body is usually colored green or white (bullish). If the asset closed lower than it opened, the body is colored red or black (bearish).

The thin, stick-like lines pointing out of the top and bottom of the real body are called wicks, shadows, or tails. These lines display the extreme price limits achieved during that trading session. Understanding how these wicks are formed is the secret to reading market sentiment on the fly.

2. Deep Dive: Anatomy of the Inverted Hammer

An inverted hammer is a single-candle formation that stands out clearly on a price chart due to its distinct, upside-down look. It looks like a standard household hammer flipped on its head.

To accurately spot a valid inverted hammer and avoid trading random noise, the candlestick must meet three strict structural criteria:

  1. The Tall Upper Wick: The upper shadow must be long. As a professional rule of thumb, it needs to be at least two to three times the size of the candle’s real body. This long tail demonstrates a massive, violent rejection of higher prices.
  2. The Small Real Body: The main body must sit comfortably at the very bottom of the candle's total price range. The color of the body does not invalidate the pattern. It can be green or red. However, a green real body means the bulls managed to force a higher close, making it structurally stronger and slightly more reliable.
  3. The Absent Lower Wick: There should be virtually no lower shadow at all. A tiny sliver of a lower wick is acceptable, but a completely flat bottom is ideal. This shows the bears were incapable of pushing the price lower than its starting point by the time the candle closed.
Financial candle charts showing technical analysis concepts

Visualizing candlestick charts cleanly allows you to read underlying human psychology at a simple glance.

Why Location is Everything

We cannot emphasize this enough: An inverted hammer can only exist at the bottom of a clear downtrend. If you see an identical candle shape floating in the middle of a sideways consolidation zone or during a roaring uptrend, it is not an inverted hammer. It is a completely different signal. The context in which a candlestick prints is always more important than the shape of the candle itself.

3. The Hidden Psychology Behind the Shape

Behind every line, wick, and color change on a financial chart lies an ongoing battle of human emotion. Trading is simply the study of fear, greed, conviction, and doubt. To master the inverted hammer candle strategy, you must peek beneath the surface to understand what the buyers and sellers were thinking during that specific timeframe.

Let’s walk through the timeline of an inverted hammer candle session step-by-step:

Phase 1: The Domination of the Bears
The market has been sliding down for days or weeks. The bears are fully in control, feeling confident and highly profitable. When the new candle opens, sellers immediately push the asset down further, looking to sustain the existing downtrend.

Phase 2: The Sudden Rebellion
Suddenly, out of nowhere, an enormous influx of buyers steps into the market. They view the asset as deeply undervalued or oversold. These buyers aggressively absorb all the sell orders and push the price sky-high. This intense buying pressure creates the tall upper wick.

Phase 3: The Final Standoff
The bears, alarmed by this sudden pushback, gather their remaining capital and launch a counter-attack. They manage to drag the price back down toward the lower boundary of the session. However, their counter-attack fails to push the price to new lows. The candle closes near its open.

The Conclusion: Although the price ended up dropping back down from its intra-session highs, the long upper wick leaves a permanent mark. It serves as concrete proof that the bulls have built up enough strength to violently snap the price upward. The bears are running out of steam, and the tide is turning.

4. Inverted Hammer vs. Similar Candle Patterns

One of the biggest mistakes amateur traders make is misidentifying candlestick patterns. Several formations look almost identical to the inverted hammer but carry completely opposite meanings. Let’s clear up any confusion right now.

Inverted Hammer vs. Shooting Star

Visually, an inverted hammer and a shooting star look identical. They both feature a small lower body and a long upper wick. The distinguishing factor is their location on the chart:

  • The Inverted Hammer occurs after a prolonged downtrend and signals a bullish reversal (price heading up).
  • The Shooting Star occurs after a prolonged uptrend and signals a bearish reversal (price heading down).

Inverted Hammer vs. Regular Hammer

Both of these candles appear at the bottom of a downtrend and signal a bullish move up. The difference lies in their orientation:

  • A Regular Hammer has its long wick pointing downward, showing that buyers instantly rejected lower prices.
  • An Inverted Hammer has its long wick pointing upward, showing that buyers actively tested higher prices before settling.
Pattern Name Trend Context Wick Direction Market Outlook
Inverted Hammer Bottom of Downtrend Pointing Up Bullish (Reversal)
Shooting Star Top of Uptrend Pointing Up Bearish (Reversal)
Regular Hammer Bottom of Downtrend Pointing Down Bullish (Reversal)

5. Five Five-Star Inverted Hammer Trading Strategies

Now that you know how to identify an inverted hammer, let’s look at how to build an actual trading plan around it. Remember, professionals do not trade patterns in a vacuum. They combine patterns with other validation tools to create a strong technical argument. Here are five powerful setups you can start using today.

Strategy #1: The Classic Next-Candle Confirmation Setup

This is the most straightforward, fundamental way to trade the inverted hammer. It is perfect for conservative, beginner-level traders who prioritize safety over chasing quick entries.

  • Step 1: Identify a distinct downtrend on your daily or 4-hour chart.
  • Step 2: Wait patiently for a perfectly formed inverted hammer candle to close.
  • Step 3: Do not enter a trade yet! Wait for the next candle to print.
  • Step 4: If the next candle opens and closes as a solid green, bullish candle above the real body of the inverted hammer, your pattern is confirmed. Enter a long position immediately on the close of that second candle.

Strategy #2: Support Zone Confluence

Horizontal support lines represent historical areas where buyers have stepped in to defend prices in the past. When an inverted hammer intersects perfectly with an old support level, its win rate climbs significantly.

  • Step 1: Look back on your chart and draw clean horizontal support lines across prominent historical swing lows.
  • Step 2: When the price slides back down to test this major support zone, watch the price action closely.
  • Step 3: If an inverted hammer forms exactly on top of or slightly piercing through that support line, it shows the level is holding. Enter the trade when the price breaks above the high of the inverted hammer candle.

Strategy #3: The Moving Average Bounce

Moving averages act as dynamic, flowing lines of support and resistance. Popular institutional indicators like the 50-period Exponential Moving Average (EMA) or the 200-period Simple Moving Average (SMA) are ideal tools for this strategy.

  • Step 4: Ensure the overall macro trend on the daily chart is bullish.
  • Step 2: Wait for a temporary pullback (a minor downtrend) to carry the price back down toward the 50 EMA or 200 SMA line.
  • Step 3: If an inverted hammer hits the moving average line and bounces off it, the moving average is serving as an effective trampoline floor. This confirms that the macro bull trend is ready to resume.

Strategy #4: RSI Momentum Divergence Combination

The Relative Strength Index (RSI) is an excellent momentum oscillator that tells you whether an asset is overbought or oversold. Combining price action with momentum divergence provides an incredibly precise market view.

  • Step 1: Look for a market where the price is making fresh lower lows, but your RSI indicator is simultaneously making higher lows. This discrepancy is known as bullish divergence.
  • Step 2: If an inverted hammer candle prints at the exact moment the bullish divergence peaks, it reveals an immense underlying buildup of buyer momentum.
  • Step 3: Execute your long trade with high confidence, using standard confirmation rules.
Stock market charts on a screen showing data and trend indicators

Combining candlestick shapes with technical indicators like the RSI can help filter out false breakouts.

Strategy #5: The Volume-Backed Breakout

Volume represents the fuel inside the market's engine. Candlesticks that form on tiny volume are easily pushed around by random market noise. High volume reveals true institutional commitment.

  • Step 1: Keep your volume histogram panel active at the bottom of your charts.
  • Step 2: When an inverted hammer forms, check its corresponding volume bar. It should stand out noticeably higher than the surrounding 10 to 15 volume bars.
  • Step 3: This spike in volume proves that major investment funds and institutions are aggressively buying up shares at these low prices, paving the way for a sustainable upward rally.

6. Absolute Risk Management: Stop-Loss & Take-Profit Formulas

Without proper risk management, even the most beautiful technical setups will eventually blow up your trading account. Professional traders do not focus on how much money they can make; they focus relentlessly on how much money they can afford to lose. Here is how to handle your trade management using the inverted hammer candle strategy.

Where to Place Your Stop-Loss Order

Your stop-loss acts as your financial emergency brake. When trading an inverted hammer setup, your invalidation point is crystal clear:

  • The Standard Rule: Place your stop-loss order roughly 2-5 pips or cents just below the lowest point of the inverted hammer’s wick.
  • Why this works: If the market continues down and crosses below that low point, it proves the bears have reassumed complete control. The pattern has officially failed, and you want to exit the market immediately to protect your remaining capital.

How to Calculate Your Take-Profit Targets

Never enter a trade without an exit target in mind. To guarantee a positive risk-to-reward ratio over time, look for a minimum ratio of 1:2. This means for every dollar you risk on a trade, you stand to make at least two dollars in profit.

To establish professional profit targets, look left on your price charts to identify old resistance areas, previous swing highs, or psychological round numbers. Set your profit targets right below those zones, as selling pressure will likely re-emerge there.

Pro Execution Tip: Consider utilizing a two-part profit-taking system. Once your trade hits a 1:1 risk-to-reward ratio, sell exactly half of your position and move your stop-loss up to your initial entry point. This creates a risk-free trade, protecting your mindset and capital simultaneously!

7. Pros and Cons of Using the Strategy

Every strategy in financial markets features structural trade-offs. Let's analyze the direct pros and cons of utilizing the inverted hammer approach:

The Advantages (Pros)

  • Extremely easy to spot visually, making it ideal for absolute beginners.
  • Provides an incredibly tight, well-defined spot for placing protective stop-losses.
  • Allows traders to catch major market trends at the absolute bottom floor.
  • Works seamlessly across stocks, crypto, forex, and commodity markets.

The Disadvantages (Cons)

  • Can trigger painful false breakouts when used in volatile, choppy sideways markets.
  • Cannot be traded efficiently on its own without outside confirmation tools.
  • Can occasionally require relatively wide stop-losses if the candle's wick is excessively long.

8. Costly Pitfalls Beginners Need to Stop Making

If you want to survive the markets long-term, ensure you do not fall victim to these common retail trading traps:

Trap #1: Jumping the Gun (No Confirmation)
Many traders experience heavy FOMO (Fear Of Missing Out) the second they see an inverted hammer form. They buy immediately before the candle even finishes closing. Remember, a candle can look like an inverted hammer ten minutes before closing, but completely change shape by the time the closing bell rings. Always wait for the candle to close completely before taking action.

Trap #2: Ignoring the Underlying Macro Environment
If a market is crashing heavily due to terrible macroeconomic news (like systemic interest rate changes or corporate scandals), a lone inverted hammer candle on a 15-minute chart will not stop that crash. Always zoom out to the daily or weekly charts to make sure you are not trading directly against an overwhelming macro waterfall trend.

9. Advanced Professional Tips for Maximizing Accuracy

Ready to take this pattern to a professional level? Apply these advanced chart-reading filters to significantly boost your overall win rate:

  • Look for the Double Bottom Confluence: If your inverted hammer prints exactly at the second low of a well-documented "Double Bottom" chart pattern, your probability of a successful reversal skyrockets.
  • Drop Down a Timeframe for Fine-Tuning: When you see a high-quality inverted hammer form on your daily chart, drop down to the 1-hour chart. You will often see an inverse head and shoulders or a breakout pattern forming inside that daily wick, allowing you to secure a hyper-precise entry with minimal risk.
  • Keep a Trading Journal: Track every single inverted hammer trade you take. Log the asset, the timeframe, the volume, whether it was green or red, and the ultimate outcome. Over a sequence of 50 trades, your journal data will tell you exactly which market conditions yield your personal highest win rates.

10. Comprehensive Frequently Asked Questions (FAQ)

Is a green inverted hammer better than a red one?

Yes, slightly. A green body means the closing price finished above the opening price, indicating the buyers won the final minutes of that session. While a red inverted hammer is still completely valid, a green one provides slightly higher historical odds of a reversal.

Can I use this strategy for day trading or scalping?

Absolutely. The inverted hammer pattern is fractal, meaning it appears on every single timeframe from 1-minute charts all the way up to monthly charts. However, keep in mind that ultra-short timeframes (like the 1-minute or 5-minute charts) contain lots of random market noise and fakeouts. The daily and 4-hour charts remain the gold standard for high-probability setups.

What happens if my stop-loss gets hit right after entering?

Getting stopped out is a normal, healthy part of a professional trading career. No technical pattern can boast a 100% win rate. When a stop-loss is triggered, it simply means this specific setup failed. Accept the minor, controlled loss gracefully, step away from the screen, and wait for the next clean setup to present itself.

How long should I expect the following uptrend to last?

There is no set timeline. An inverted hammer can trigger a short-term relief rally that lasts only 3 to 5 candles, or it can mark the absolute macro bottom of a multi-year bear market cycle. This is why trailing your stop-loss or setting multi-tiered profit targets is so critical for maximizing your upside.

Is an inverted hammer the same as a pin bar?

A pin bar is a broader term used in bar-chart price action strategies to describe any candle with a very long tail and a tiny body. An inverted hammer is essentially a specific type of bullish pin bar that occurs exclusively at the bottom of a downtrend with its tail pointing skyward.

The Bottom Line Summary

The inverted hammer candle strategy is a robust, time-tested approach to spotting early trend turnarounds before the rest of the market catches on. By looking for the distinctive long upper wick after an extended decline, you are training yourself to spot institutional buying interest in real-time. Practice identifying this pattern on a risk-free demo account first, apply strict confirmation rules, protect your capital with logical stop-losses, and allow technical price action to remove the guesswork from your daily trading routine!

Wednesday, June 3, 2026

What is the Hammer Candlestick Pattern? An Easy and Complete Guide for Beginners

Introduction 

If you are learning stock market, cryptocurrency, or forex trading, then the Hammer Candlestick Pattern is one of the most important patterns you should understand.

Many new traders take a trade immediately after seeing a Hammer and end up facing losses. However, successful traders do not focus only on the pattern; they understand the story behind it.

Table of Contents

What is a Hammer Candlestick Pattern?

A Hammer is a Bullish Reversal Pattern that usually forms after a downtrend.

Hammer Candlestick Pattern on a real trading chart showing bullish reversal at support level with volume confirmation

It indicates that sellers pushed the price lower, but buyers stepped in strongly and brought the price back up.

How to Identify a Hammer Candle?

  • Small Real Body
  • Long Lower Wick
  • Very Small or No Upper Wick
  • Forms after a Downtrend
  • More reliable when formed with High Volume

Market Psychology

The market psychology behind a bullish reversal hammer candlestick pattern reflects a shift in control from sellers to buyers during a downtrend. Initially, strong selling pressure pushes the price significantly lower. However, buyers step in aggressively at these lower levels and drive the price back up before the session closes. This results in a candle with a small body at the top and a long lower shadow. It indicates that demand is emerging at lower prices and sellers are losing strength, signaling a potential reversal in trend from bearish to bullish sentiment. 

Suppose a stock falls from ₹500 to ₹450 and everyone is selling. Then large buyers start purchasing at ₹450. The price drops to ₹440 but eventually closes at ₹455. Then a Hammer Candle appears on the chart.

[₹500] ───┐

            │  (Prior Downtrend: Non-stop Selling)

            └───> [₹450]  <─── Session Opens Here

                  ━━━━━   <─── High of the Session (₹455)

                  ┃   ┃   

                  ┃   ┃   <─── Real Body (Green/Bullish)

                  ┃   ┃        [Price gap between Open & Close]

                  ━━━━━   <─── Close of the Session (₹455)

                     │

                     │

                     │

                     │     <─── Long Lower Shadow / Wick

                     │          (Sellers completely rejected by the market)

                     │

                     │

                  ─ ┴ ─   <─── Low of the Session (₹440)

This shows that buyers are returning to the market.

Hammer Trading Setup

Step 1: Find a Downtrend

A Hammer is generally considered more effective when it forms after a downtrend.

Step 2: Look for a Support Zone

If a Hammer forms at a strong support level, its reliability increases.

Step 3: Wait for Confirmation

The next candle should close above the Hammer's high.

Entry, Stop Loss and Target

Entry

Take a buy entry above the Hammer high.

Stop Loss

Place the stop loss below the Hammer low.

Target

  • Next Resistance Level
  • 1:2 Risk Reward Ratio
  • 1:3 Risk Reward Ratio

RSI Confirmation

If RSI is near 30 and starts moving upward, it can provide additional confirmation.

Volume Analysis

If a Hammer forms with high volume, the signal is generally considered stronger.

Support & Resistance

  • Major Support
  • Demand Zone
  • Trendline Support
  • Moving Average Support

Real Example

Suppose Bitcoin falls from ₹85 lakh to ₹80 lakh.

  • A Hammer Candle forms
  • RSI is Oversold
  • Volume increases
  • The next candle closes above the Hammer high

This provides multiple confirmations for a potential bullish setup.

Frequently Asked Questions

Is a Hammer Candle always bullish?

No. Confirmation is required.

Can Hammer Patterns work in intraday trading?

Yes, they are used on multiple timeframes.

What is the difference between a Hammer and a Hanging Man?

A Hammer forms after a downtrend, while a Hanging Man forms after an uptrend.

Can Hammer Patterns work in Crypto?

Yes. They are used in Stocks, Forex, Commodities, and Cryptocurrencies.

Conclusion

The Hammer Candlestick Pattern represents the battle between buyers and sellers. When it appears with strong support, increasing volume, and RSI confirmation, it can become a valuable signal for traders.

Disclaimer: This article is for educational purposes only and should not be considered financial or investment advice.

Tuesday, June 2, 2026

Bearish Engulfing Pattern: Complete Trading Guide, Strategy, Examples & Trading Psychology

Introduction 

The Bearish Engulfing Pattern is one of the most widely recognized bearish reversal candlestick patterns in technical analysis. Traders use this pattern to identify potential trend reversals after an uptrend and to spot opportunities where selling pressure may be taking control of the market.

Whether you trade stocks, cryptocurrencies, forex, or commodities, understanding the Bearish Engulfing Pattern can help improve your market analysis and decision-making process.

In this comprehensive guide, you'll learn how the pattern forms, why it works, how professional traders use it, common mistakes to avoid, and how to combine it with other technical indicators for better trading decisions.


Table of Contents

  1. What Is a Bearish Engulfing Pattern?
  2. How Does the Pattern Form?
  3. Market Psychology Behind the Pattern
  4. How to Identify a Bearish Engulfing Pattern
  5. How to Trade the Pattern
  6. Entry, Stop Loss & Profit Target
  7. Importance of Volume
  8. Using RSI with Bearish Engulfing
  9. Using Moving Averages
  10. Advantages
  11. Limitations
  12. Common Trading Mistakes
  13. Real-World Example
  14. Related Trading Guides
  15. Conclusion
  16. FAQs

What Is a Bearish Engulfing Pattern?

A Bearish Engulfing Pattern is a two-candle bearish reversal pattern that typically appears after an uptrend.

  • The first candle is bullish (green).
  • The second candle is bearish (red).
  • The body of the second candle completely engulfs the body of the first candle.
    Bearish Engulfing Pattern on a realistic cryptocurrency chart showing bearish reversal, volume confirmation, RSI analysis, entry point, stop loss, and technical analysis.

This pattern suggests that sellers have suddenly gained control and may push prices lower.


How Does the Pattern Form?

The Bearish Engulfing Pattern generally develops in four stages:

1. Existing Uptrend

The market has been moving upward, showing strong buying momentum.

2. Bullish Candle Appears

A bullish candle forms, indicating that buyers are still active.

3. Sellers Enter the Market

On the next candle, selling pressure increases significantly.

4. Engulfing Action

The bearish candle becomes large enough to completely cover the body of the previous bullish candle.

This signals a potential shift in market sentiment from bullish to bearish.


Market Psychology Behind the Pattern

Understanding market psychology is crucial for successful trading.

During an uptrend, buyers are confident and continue pushing prices higher. However, when a large bearish candle suddenly engulfs the previous bullish candle, it indicates that sellers have overwhelmed buyers.

The pattern reflects a transfer of market control from bulls to bears. This is why many traders consider it an early warning sign of a possible trend reversal.


How to Identify a Bearish Engulfing Pattern

  • A clear uptrend should exist before the pattern.
  • The first candle must be bullish.
  • The second candle must be bearish.
  • The bearish candle's body should completely engulf the previous candle's body.
  • Higher volume can strengthen the signal.
  • The pattern is more reliable near resistance zones.
    Bearish Engulfing Pattern on a realistic cryptocurrency chart showing bearish reversal, volume confirmation, RSI analysis, entry point, stop loss, and technical analysis.


How to Trade the Bearish Engulfing Pattern

Professional traders rarely rely on a single candlestick pattern. Instead, they look for confirmation from additional indicators and price action.

Wait for Confirmation

Many traders wait for the next candle to close below the bearish engulfing candle before entering a trade.

Check Market Structure

The pattern is more effective when it appears near resistance levels, trendlines, or key moving averages.


Entry, Stop Loss & Profit Target

Entry

  • Sell below the low of the bearish engulfing candle.
  • Wait for confirmation if possible.
    Bearish Engulfing Pattern on a realistic cryptocurrency chart showing bearish reversal, volume confirmation, RSI analysis, entry point, stop loss, and technical analysis

Stop Loss

  • Place the stop loss above the high of the engulfing pattern.

Profit Target

  • Nearest support level.
  • Risk-reward ratio of 1:2 or 1:3.
  • Major demand zone.

Importance of Volume

Volume plays a critical role in validating the Bearish Engulfing Pattern.

Bearish Engulfing Pattern on a realistic cryptocurrency chart showing bearish reversal, volume confirmation, RSI analysis, entry point, stop loss, and technical analysis

If volume increases significantly during the bearish engulfing candle, it indicates stronger selling participation and increases the reliability of the signal.


Using RSI with Bearish Engulfing Pattern

The Relative Strength Index (RSI) can improve the accuracy of this setup.

  • RSI above 70 indicates overbought conditions.
  • If a Bearish Engulfing Pattern forms while RSI is overbought, the reversal signal becomes stronger.


Using Moving Averages

Many traders combine Bearish Engulfing Patterns with moving averages.

  • 50 EMA
  • 100 EMA
  • 200 EMA

If the pattern forms near a major moving average acting as resistance, it may carry additional significance.


Advantages of Bearish Engulfing Pattern

  • Easy to identify.
  • Suitable for beginners.
  • Works across multiple markets.
  • Provides early reversal signals.
  • Can be combined with other indicators.
  • Useful for swing trading and short-term trading.

Limitations of Bearish Engulfing Pattern

  • Not 100% accurate.
  • False signals may occur.
  • Less effective in sideways markets.
  • Requires confirmation.
  • Can fail during strong bullish trends.

Common Trading Mistakes

Trading Without Confirmation

Entering immediately after spotting the pattern can increase risk.

Ignoring Volume

Volume often provides crucial confirmation.

Skipping Stop Loss

Risk management is essential.

Ignoring Overall Trend

The pattern works best after an established uptrend.


Real-World Example

Imagine Bitcoin rallies from $90,000 to $100,000 over several days.

A small bullish candle forms near a major resistance level. The next day, a large bearish candle completely engulfs the previous candle while trading volume spikes.

This combination may indicate that buyers are losing momentum and sellers are gaining control.


  • [Internal Link: Bullish Engulfing Pattern Guide]
  • [Internal Link: Hammer Candlestick Pattern]
  • [Internal Link: Doji Candlestick Pattern]
  • [Internal Link: Shooting Star Pattern]
  • [Internal Link: RSI Trading Strategy]
  • [Internal Link: Support and Resistance Guide]
  • [Internal Link: Risk Management in Trading]
  • [Internal Link: Candlestick Chart Analysis]

Conclusion

The Bearish Engulfing Pattern remains one of the most effective bearish reversal candlestick patterns in technical analysis. It provides traders with valuable insights into potential changes in market sentiment and can help identify high-probability trading opportunities.

However, no trading pattern is perfect. Successful traders combine Bearish Engulfing signals with volume analysis, RSI, support and resistance levels, and proper risk management.

By understanding the psychology behind the pattern and waiting for confirmation, traders can make more informed decisions and improve their overall trading strategy.


Frequently Asked Questions (FAQs)

What is a Bearish Engulfing Pattern?

A two-candle bearish reversal pattern where the second bearish candle completely engulfs the previous bullish candle.

Is the Bearish Engulfing Pattern reliable?

It can be reliable when combined with volume, support-resistance levels, and confirmation signals.

Can beginners use this pattern?

Yes. It is one of the easiest candlestick patterns to identify.

Does it work in cryptocurrency trading?

Yes. The pattern works in crypto, stocks, forex, and commodity markets.

What indicators work best with Bearish Engulfing?

RSI, Moving Averages, Volume Analysis, MACD, and Support-Resistance levels.

What timeframe is best for Bearish Engulfing Pattern?

Higher timeframes such as 4-hour, daily, and weekly charts generally provide more reliable signals.

Can the pattern fail?

Yes. Like all technical patterns, false signals can occur.

Should I use stop loss with this pattern?

Yes. Always use proper risk management and stop-loss orders.


Author Experience & E-E-A-T Information

This article is based on technical analysis principles, candlestick pattern studies, market psychology concepts, and commonly accepted trading methodologies used by traders worldwide. The goal is to provide educational content that helps readers understand and identify the Bearish Engulfing Pattern in real market conditions.


Disclaimer

This article is for educational and informational purposes only. It does not constitute financial, investment, or trading advice. Trading and investing involve risk, and you should conduct your own research before making financial decisions. Always consult a qualified financial professional if needed.

The Ultimate Gravestone Doji Trading Guide: Master Market Tops and Bearish Reversals Like an Expert A comprehensive, a...